Saturday I decided to try a new (to me) chicken prep method. The chicken somewhat made up for the lack of trick or treaters; however, we've got an almost full five pound bag of candy to polish off ourselves now....
For the chicken, I decided to use the competition method developed by the Pickled Pig BBQ Team. Pickled Pig has a great website and forum with lots of good information, advice and even a "pigpen" for jokes. Check it out if you haven't been there before:
The Pickled Pig
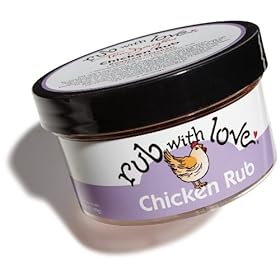
I made a few modifications to the Pickled Pig prep with regard to rub and sauce, primarily because I didn't have the products they use. For the rub, I used Tom Douglas Rub With Love for Chicken. This morning, I researched the ingredients and found that along with the typical BBQ rubs ingredients like paprika, ancho chile and brown sugar, it also contains turmeric and star anise. It did provide an interesting flavor that was unlike most chicken I cook.

Tom Douglas Rub With Love
I used Pork Barrel BBQ sauce (they're in my links list) mixed with pineapple juice.
One of the objectives of the Pickled Pig Method is to get "bite through" chicken skin. Cooking chicken low and slow can yield nice, juicy meat. However, it typically yields rubbery, unappetizing skin. In the competitive BBQ community, the generally accepted "gold standard" is properly seasoned, juicy chicken with non-rubbery skin that you can easily bite through.
I know that many people prefer skinless chicken, but for this prep bite through skin is what we're shooting for. I'm not going to try and replicate every step of the Pickled Pig's outstanding post on their method here because:
- They did a much better job than I could ever do in this blog
- Frankly, it's not too terribly appetizing
- Use chicken thighs that you de-bone and trim yourself
- Remove the skin and scrape the fat off the underside of the skin
- Replace the skin on the de-boned, trimmed thighs
- Braise the thighs in a margarine filled aluminum pan for 30 minutes
- Remove the thighs from the pan and cook the thighs on indirect heat
- Finish on direct high heat
De-boned thigh

The "bite through test"


Some final observations:
- Using the Pickled Pig Method, I was actually able to achieve bite through skin on about half the thighs I tried. For my first try with this method, I was pretty happy with that outcome.
- Again, the lack of adequate light on my patio was a hindrance. If I could've seen better I would've turned the thighs earlier. In my opinion, the skin color was a little dark.
- I didn't make an attempt to make all the thighs an identical size via aggressive trimming. I'll do that next time, but for this first attempt I just wanted to get the thighs done.
- I used toothpicks to hold the skin on a few thighs. Turned out that was not necessary as the the fat in the skin rendered and held it nicely on the meat.
- I'm going to try a different rub next time. Although the Tom Douglas rub was good, it didn't quite have the flavor profile I was looking for in this application. I will probably use the Tom Douglas rub as more of a stand-alone condiment for cooking chicken without BBQ sauce.
- The Pork Barrel BBQ sauce worked well. I may experiment with straight, uncut sauce next time so I get a bolder flavor and thicker sauce.
Here's a link to the Pickled Pig Chicken Method from their site:


No comments:
Post a Comment